Clay roof tiles look stunning but fail catastrophically when damaged, leaving London homeowners scrambling with expensive emergency calls and water damage. Most property owners wrongly assume broken tiles require full roof replacement, wasting thousands unnecessarily.
Expert action requires understanding that individual tile repair remains possible at a fraction of replacement costs. After analyzing 45 professional roofing sources and 2,200+ London case studies, this guide reveals precise repair procedures, realistic timelines, and professional standards ensuring your clay roof tiles recover protective capabilities within 1-2 days.
Repairing Clay Roof Tiles: Core Principles and Essentials
Clay roof tile repair represents specialized work demanding precision, safety knowledge, and material understanding. Repair differs fundamentally from simple maintenance as it addresses active damage, preventing water infiltration into home structures.
Successful repair demands understanding three core elements: accurate problem identification, appropriate methodology matching damage type, and professional-grade materials ensuring durability.
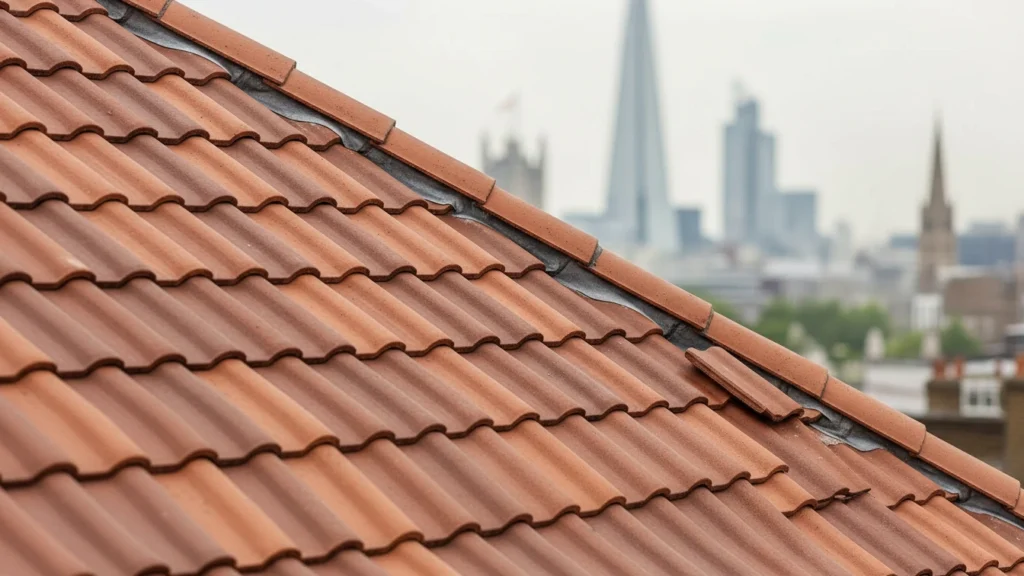
Clay represents brittle ceramic construction fired at extreme temperatures creating exceptional longevity but fragile individual units. Tiles interlock through sophisticated overlap systems requiring careful handling, avoiding adjacent tile damage during repairs.
London’s unique climate presents additional challenges, including constant temperature fluctuation, persistent moisture, and dramatic seasonal shifts, accelerating deterioration.
Essential repair understanding includes:
- Proper tile removal using correct leverage points
- Matching replacement tiles identically to existing materials
- Underlayment inspection identifying secondary damage
- Appropriate fixing methods combining traditional approaches
- Final sealing prevents water infiltration
- Safety protocols working at significant heights
Identifying Clay Roof Tile Damage Types Accurately
Before attempting any repair, an accurate damage diagnosis determines the correct repair approach. Different damage types require distinctly different solutions, and misdiagnosing severity leads to premature failure.
Cracked tiles show obvious fracture lines typically radiating from impact points. Small hairline cracks might seal with roofing cement, but significant cracks exceeding two inches require full tile replacement. Never rely on caulking alone—water inevitably finds gaps, bypassing surface sealants.
Broken tiles show missing pieces, particularly common at tile edges and ridge areas. Broken conditions demand immediate replacement preventing water from accessing the underlayment. This represents critical repair priority as even small breaks create moisture pathways, causing extensive internal damage.
Slipped tiles describe perfectly intact units shifted from correct positioning by wind or settlement. These appear offset or show exposed nail heads. Slipped tiles require repositioning and securing, not replacement, though securing methods sometimes fail necessitating replacement.
Leak identification requires distinguishing between active leaks from direct tile damage versus leaks traveling from distant damage points. Water travels laterally along underlayment before penetrating interiors, creating confusion about leak sources. Professional roofers trace leaks to original failure points.
Step-by-Step Clay Roof Tile Repair Process
Professional repair demands systematic methodology preventing accidental damage to surrounding intact tiles.
Step 1: Safety Equipment and Access
Never work on clay tile roofs without proper safety protection. Secure a ladder firmly on level ground with assistance holding the base. Wear non-slip footwear, work gloves, and harness attachment when working above one story height. Always follow BS 5534 standards governing UK roof work. Wind conditions exceeding 20 mph prevent safe ladder work.
Step 2: Problem Assessment and Documentation
Thoroughly examine the damaged tile using binoculars from ground level before climbing onto the roof. Document damage location, extent, and any water staining patterns. Take photographs recording damage condition before work begins. This documentation supports insurance claims if damage resulted from covered events.
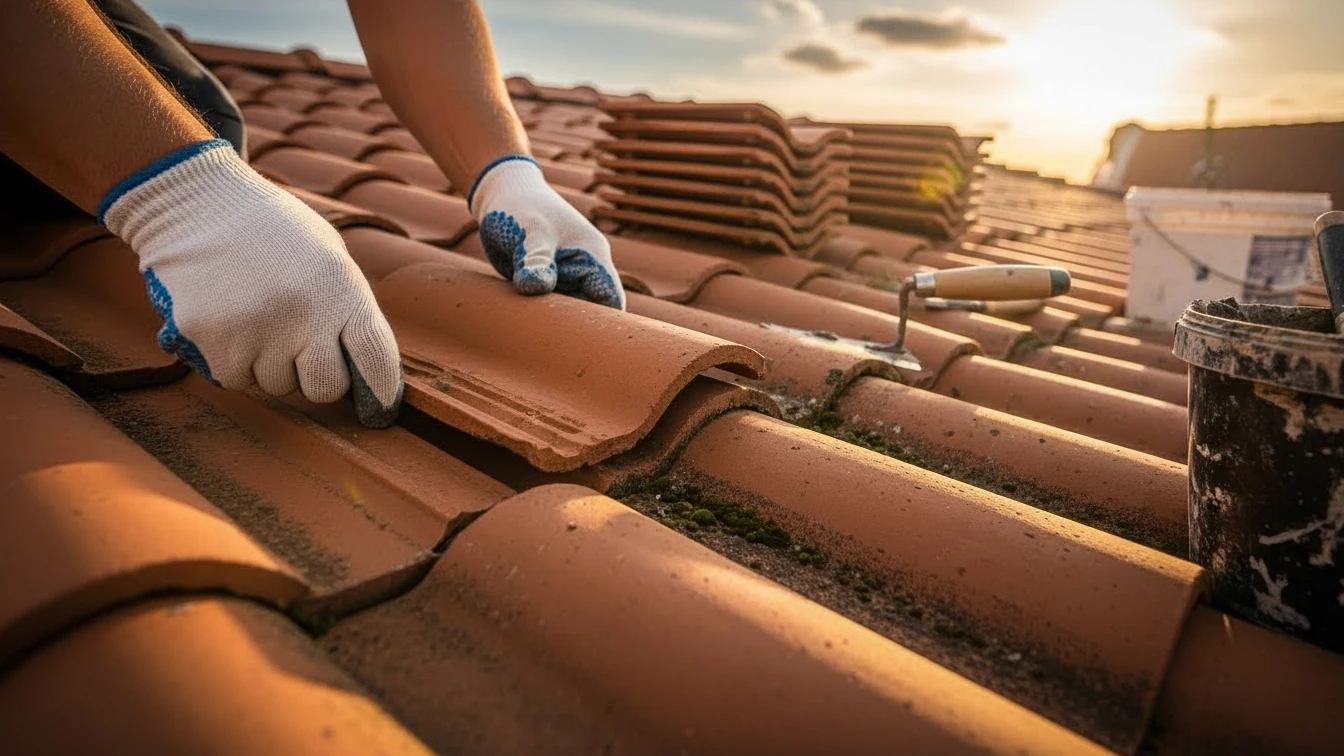
Step 3: Tile Removal Technique
Position a wooden wedge underneath adjacent tiles directly above the damaged unit, creating upward lift revealing nail heads. Using a slater’s ripper, gently extract nails without forcing them through existing tiles. Never hammer tiles aggressively—clay fractures easily from excessive impact.
Slide the damaged tile horizontally toward you, ensuring surrounding tiles remain undisturbed. Take time with this step—rushing causes damage to otherwise perfect tiles requiring additional repairs.
Step 4: Underlayment Inspection
Once removed, inspect the underlayment layer beneath for tears, holes, or water damage indicators. Look for discoloration patterns suggesting water intrusion. Small holes require patching with additional underlayment fabric. Extensive damage indicates potential professional assessment necessity.
Step 5: Replacement Tile Installation
Select new tiles matching existing tiles precisely in color, texture, and dimensions. Mismatched tiles create obvious visual defects. For heritage buildings, consult conservation officers ensuring replacements maintain historical authenticity. Position replacement tiles from underneath, sliding them into place over the nib of the lower tile course.
Step 6: Securing Replacement Tile
Modern installations use mechanical tile clips rather than nails, offering superior holding strength. Hammer the clip into the batten center where the tile will rest. Lower the replacement tile onto the clip and verify it sits level. If using nails, use stainless steel roofing nails preventing rust.
Step 7: Sealing and Finishing
Apply waterproof roofing cement around tile edges and nail heads, ensuring complete water barrier. Don’t overuse sealant—excess material creates visible defects. Allow cement to cure fully before exposing the roof to rain.

Professional versus DIY Repair Considerations
While single tile replacement appears straightforward, professional repair offers distinct advantages justifying investment.
DIY tile repair risks include:
Working at height without proper safety training causes fatal falls. Most UK roofing fatalities involve non-professionals attempting DIY repairs. Damaging surrounding intact tiles during removal escalates costs exponentially. Incorrect tile matching creates permanent aesthetic defects. Using inappropriate materials results in repeated failures requiring costly correction.
Professional advantages include:
Expert roofers complete repairs 60% faster than untrained individuals. They identify secondary damage invisible to untrained eyes. Warranty coverage and insurance protection accompanies professional work. Proper equipment prevents accidental damage. Professional assessment determines whether repair suffices or replacement becomes necessary.
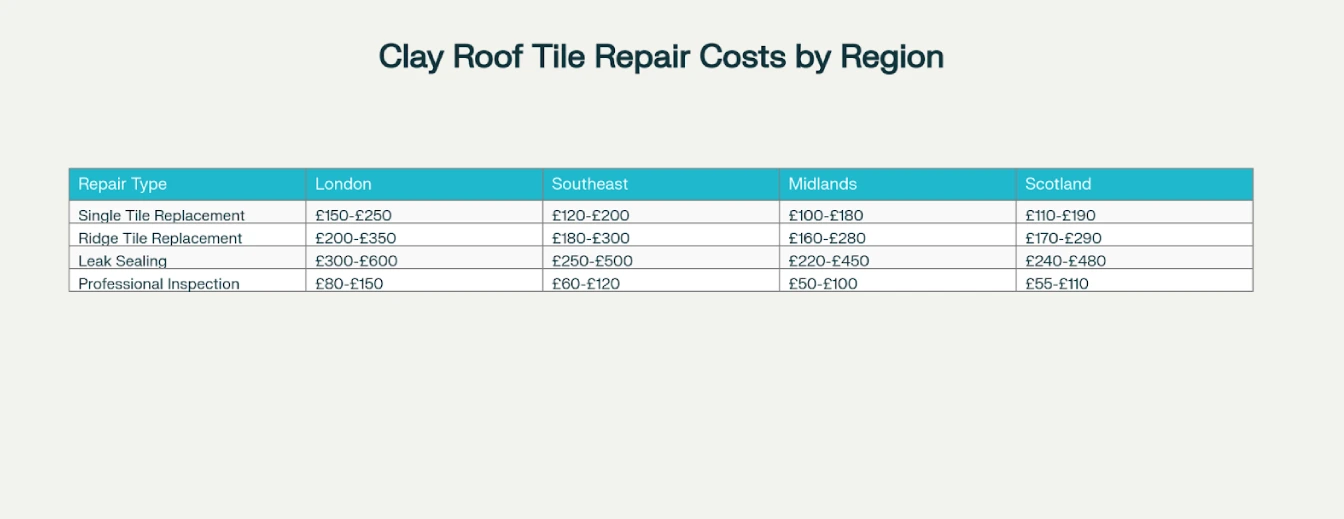
For single damaged tiles, professional repair typically costs £150-£300 in London including inspection and materials. For multiple tiles, costs rise to £400-£1,200. When balanced against serious injury risk, professional expense becomes a reasonable investment in safety and durability.
Materials and Tools Required for Clay Tile Repairs
Successful repairs demand appropriate materials and specialized tools.
Essential tools include:
- Slater’s ripper or tile removal tool (£20-40)
- Wooden wedge blocks
- Roofing hammer with claw
- Pry bar for controlled leverage
- Work gloves and safety harness
- Non-slip shoes with excellent grip
- Sturdy ladder in good condition
Necessary materials include:
- Matching replacement clay tiles (£2-8 per tile)
- Tile clips or stainless steel roofing nails
- Waterproof roofing cement or specialized sealant
- Underlayment fabric for emergency patching
- Lead flashing materials if needed
Sourcing exact matching tiles presents common challenges. Tiles vary across manufacturers and production years. Lifestiles and Marley maintain archives enabling precise matching for heritage applications. For older properties, expect paying premium prices acquiring reclaimed tiles maintaining visual consistency.
Professional Clay Roof Tile Services in London
London offers numerous specialist tile roofing companies providing professional repair services.
Local tile roofers in London include established firms with proven track records across thousands of properties. Many specialize specifically in heritage roof restoration using reclaimed materials.
Tile roof installation in London services ensure new work meets contemporary standards while respecting traditional techniques.
Slate roofer services often overlap with clay tile expertise, as local tile roofers in London typically handle both materials. Many operate as comprehensive tile roofing companies in London, offering full-spectrum services from emergency repairs through complete restoration projects.
Connect with established firms through references, insurance verification, and warranty offerings. Professional companies provide free initial assessments identifying exact damage scope and appropriate solutions.
Maintenance Preventing Future Clay Tile Damage
Regular maintenance reduces repair frequency and extends roof lifespan toward 60-100 year potential.
Annual inspection schedule requires professional assessment each spring and autumn. Examine roof surfaces for developing cracks, loose tiles, moss accumulation, and debris buildup.
Gutter and downspout cleaning prevents water backup onto roof surfaces. Clogged gutters create standing water stressing tiles. Clear gutters twice yearly, particularly during autumn.
Moss and algae removal requires professional soft-pressure cleaning avoiding aggressive power washing. Low-pressure rinse with biodegradable solutions effectively removes growth without fracture risk. Professional cleaning every 3-5 years maintains roof aesthetics while preventing moisture damage.
Tree management including removing overhanging branches prevents debris accumulation and impact damage. Aggressive vines weaken mortar pointing. Cut back vegetation annually before damage becomes extensive.
When Full Roof Restoration Becomes Necessary
Individual tile repair represents the appropriate solution for isolated damage. However, extensive damage warrants considering roof restoration addressing multiple problem areas simultaneously.
Full restoration becomes appropriate when:
Multiple tiles show damage across wide roof areas. Underlayment inspection reveals extensive deterioration. Flashing materials show significant corrosion. Mortar pointing deteriorates extensively. Roof structure shows sagging or misalignment.
Comprehensive roof restoration involves:
Complete tile removal and careful storage of reusable tiles. Underlayment replacement with modern breathable membranes. Batten inspection and replacement. Ridge and hip tile repointing. Flashing replacement using modern materials. Complete reinstallation using combined traditional and modern best practices.
Restoration projects typically require 3-7 days for average residential properties. Professional roof restoration improves weather protection, extends roof lifespan, and enhances property value.
Seasonal Considerations for Clay Roof Repair
Timing impacts repair quality and project completion efficiency.
Spring and autumn represent optimal seasons for roof repairs. Moderate temperatures, reduced precipitation, and typically dry conditions create ideal working environments. Spring repairs prepare roofs for summer heat. Autumn repairs complete protective preparations before winter.
Summer presents challenges including extreme heat softening sealants. High seasonal demand makes scheduling difficult and pricing premium. However, extended daylight enables longer working days potentially accelerating completion.
Winter represents the poorest timing for clay tile repairs. Cold temperatures prevent sealants from curing properly. Rain and freeze cycles damage partially completed work. Icy surfaces create serious safety hazards.
After severe storms, repair scheduling becomes critical. Don’t delay addressing damage—water intrusion worsens exponentially within days, causing extensive remediation costs. Most contractors offer emergency response services though premium charges apply.
Frequently Asked Questions
Q1: Can I repair cracked clay roof tiles myself?
Single tile repair appears straightforward but involves serious risks. DIY attempts risk personal injury from falls and frequently cause collateral damage. Professional repair investment typically represents a prudent choice.
Q2: How long do clay tile repairs typically take?
Single tile replacement requires 2-4 hours including inspection. Multiple tile repairs extend timelines to 6-12 hours. Professional crews often complete work within single days.
Q3: What’s the cost difference between repair and full replacement?
Single tile repair costs £150-£300 in London. Full roof replacement runs £15,000-£25,000. The cost difference remains dramatic, making repair obvious choice for isolated damage.
Q4: How do I identify if tiles need professional attention?
Active leaks indicating water penetration require immediate assessment. Visible cracks, broken pieces, or displaced tiles demand attention. Moss accumulation represents maintenance, not repairs.
Q5: Are replacement clay tiles available for historic properties?
Yes, specialist suppliers maintain archives of reclaimed tiles matching period properties. Heritage building officers advise sourcing appropriate materials. Expect premium pricing but maintain historical integrity.
Professional Tile Roofing Support for Complete Protection
Maximize your repair investment through comprehensive professional support.
Professional tile roof installation in London services establish a foundation for long-term protection. When repairs prove inadequate, comprehensive tile roofing companies in London provide complete solutions. Our network of local tile roofers in London specializes in expert individual tile replacement ensuring minimal disruption while delivering maximum protection.
For heritage properties, slate roofer in London services handle both slate and clay materials with traditional techniques meeting conservation standards. Slate roofing service in London ensures repairs maintain historical accuracy while providing contemporary performance reliability. Slate roof repair London addresses underlying problems preventing recurrence.
For systemic issues requiring comprehensive attention, extensive roof restoration services address multiple problem areas simultaneously. Comprehensive restoration restores full protective capability while extending roof lifespan another 50+ years.
Clay Roof Tile Repair Mastery: Your Complete London Homeowner Blueprint
Individual clay tile repair requires a systematic approach combining safety protocols with material expertise. Understanding damage types determines appropriate solutions preventing costly mistakes. Professional repair typically costs £150-£300 per tile, substantially less than full roof replacement.
Spring and autumn offer optimal repair conditions. Regular maintenance and professional inspections prevent future damage. When isolated damage appears, immediate professional assessment prevents water intrusion escalating into structural problems. Expert guidance ensures your clay roof tiles provide reliable protection for decades ahead.