Maintaining a tile roof in London requires careful attention and systematic repairs. From inspecting your roof thoroughly and assessing damage severity, to removing broken tiles, repairing flashing and mortar joints, and applying waterproof sealant, each step ensures long-lasting protection against rain and weather wear.
This guide walks you through essential tools, moss removal tips, and seasonal considerations, empowering you to handle repairs safely and efficiently.
By following these steps, you’ll learn how to prevent costly damage, extend your roof’s lifespan, and know when to call professional experts. Keep reading to uncover practical strategies and expert insights that safeguard your home year-round.
7 Steps to Repair a Tile Roof in London
Starting with proper inspection and moving through systematic repair stages ensures your roof receives appropriate care at each phase.
Step 1: Inspect Your Roof Thoroughly
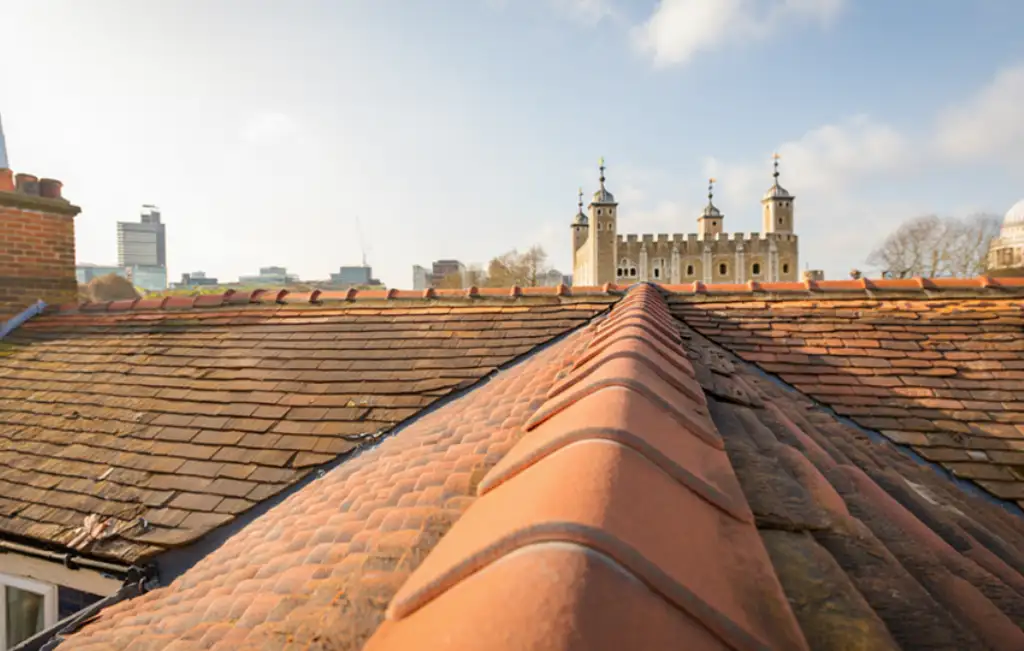
The foundation of effective repairs begins with a detailed inspection. Climb safely onto your roof or use binoculars from ground level to identify problem areas. Look for cracked tiles, missing pieces, slipped sections, and damaged mortar joints.
Water stains on ceilings often signal underlying roof issues before visible exterior damage appears. Pay close attention to valleys and areas where tiles overlap, as these spots accumulate debris and moisture. Document each problem with photos for reference during repairs.
Step 2: Assess Damage Severity and Safety
Determining urgency prevents unnecessary panic while identifying genuinely concerning situations requiring immediate action.
Not all tile damage requires immediate attention, but some situations demand urgency. Loose tiles near edges pose safety risks to passersby below, while missing tiles expose wooden structures to water infiltration. Moss or algae growth indicates moisture retention, but typically doesn’t require emergency repair.
Evaluate your comfort level with heights and exposure before deciding on DIY work versus professional assistance. Steep roofs or extensive damage warrant calling specialists who carry proper insurance and safety equipment.
Step 3: Gather Essential Tools and Materials
Preparation prevents delays and ensures you maintain safety throughout your repair project.
Assemble a sturdy ladder, roof brackets or scaffolding, a safety harness, gloves, and sturdy footwear with good grip. You’ll need replacement tiles matching your roof’s profile and color, roofing cement or adhesive, a grout knife, and a hammer or mallet.
Waterproof sealant protects newly repaired areas from London’s frequent rainfall. Keep a first-aid kit nearby and inform someone of your work schedule for emergency contact purposes.
Step 4: Remove and Replace Damaged Tiles
Careful tile removal prevents disturbing surrounding pieces and ensures proper reinstallation of replacement materials.
Begin by removing broken tiles carefully to avoid creating additional damage. Gently lift adjacent tiles to access underlying nails or clips securing damaged sections. Use a hammer and chisel to break away old cement holding the tile in place.
Clear debris and old adhesive thoroughly before installing the replacement tile. Secure new tiles using roofing cement or clips, ensuring they align properly with surrounding tiles. Allow adhesive to cure according to product instructions before exposing the area to moisture.
Step 5: Repair Flashing and Mortar Joints
Flashing failures often precede tile deterioration, making this step crucial for long-term roof integrity.
Flashing—the metal strips sealing roof transitions—often fails before tiles themselves deteriorate. Inspect flashing around chimneys, vents, and valleys for rust, separation, or deterioration. Remove compromised flashing and replace it with new materials, securing tightly to prevent water ingress.
Cracked or eroded mortar joints between tiles require careful repointing using compatible cement. Remove old mortar to approximately one inch depth, dampen the cavity, and apply fresh mortar with a grout knife. Smooth joints to match existing patterns for both function and aesthetics.
Step 6: Address Moss and Debris Accumulation
Regular cleaning prevents moisture retention and significantly extends your roof’s operational lifespan.
London’s climate encourages moss and algae growth, which traps moisture and accelerates deterioration. Remove debris gently using a soft brush or leaf blower set to low pressure—high-pressure washing damages tiles and forces water beneath the surface.
Treat moss with appropriate biocides if desired, following product safety instructions carefully. Keep gutters clear of leaves and sediment to prevent water backup that damages roof edges. Regular maintenance reduces future damage and extends your roof’s lifespan considerably.
Step 7: Seal and Waterproof Repaired Areas
Final waterproofing protects your completed work from London’s unpredictable weather patterns.
After completing repairs, apply waterproof sealant to protect vulnerable spots. Use products specifically formulated for tile roofs and London’s weather conditions. Apply sealant carefully around repaired tiles, flashing edges, and mortar joints.
Allow adequate curing time—typically 24-48 hours—before exposing the roof to rain. This final step significantly increases the longevity of your repairs and prevents water infiltration into your home’s structure.
When to Seek Expert Roofing Solutions in London?

Professional contractors provide expert roofing solutions in London with specialized knowledge, equipment, and insurance that homeowners typically cannot match.
Certain situations exceed typical homeowner capabilities and demand professional expertise. Steep roofs exceeding 45 degrees, extensive damage affecting multiple roof sections, or structural concerns visible underneath warrant qualified contractor involvement. Safety considerations are paramount.
Falls from height represent serious risks that professionals mitigate through training and equipment. Complex repairs involving multiple tile types, architectural tiles, or historic properties require specialist knowledge.
Obtaining multiple quotes from established local firms ensures fair pricing and qualified workmanship. Professional teams complete projects efficiently while maintaining high-quality standards.
Understanding Tile Roof Installation in London
Understanding tile roof installation in London helps you maintain your roof effectively and communicate confidently with professionals. Learning the fundamentals of repair goes hand in hand with knowing proper installation methods.
Traditional London slate tile roofs have evolved over centuries to withstand the local climate, with correct pitch angles, ventilation, and quality underlayment preventing moisture problems before they arise. Historic properties often use clay tiles that require specialized knowledge, while modern installations may feature durable concrete alternatives.
Knowing these differences allows you to make informed decisions and better appreciate your roof’s construction and maintenance needs.
Long-Term Maintenance for Tile Roof’s Longevity
Strategic ongoing care extends your slate tile roof’s longevity far beyond minimum expectations. Maintaining a long-lasting roof depends on consistent preventive maintenance.
Schedule annual inspections after winter to assess weather damage and address issues promptly. Keep gutters clear and ensure downspouts direct water away from foundations properly.
Trim overhanging branches that drop debris and shade roofs, which encourages moss growth. Address small repairs early before they escalate into costly problems. For older roofs approaching their typical lifespan, consider professional inspections every 5–10 years to safeguard your roof and ensure its longevity.
Professional Roof Renovation Services in London
Comprehensive roof renovation services in London often prove more economical than continuous piecemeal repairs over extended periods. These services address aging roofs completely rather than patching problems repeatedly.
Specialists assess structural integrity, replace deteriorated underlayment, upgrade ventilation systems, and install entirely new tile sections when necessary. Complete renovation often costs less than incremental repairs spread over years.
Modern materials and techniques improve energy efficiency and weather resistance significantly. Professional teams handle debris removal, dispose of materials responsibly, and restore your roof’s aesthetic appeal alongside functional improvements. This approach prevents recurring issues from emerging unexpectedly.
Seasonal Considerations for London Roof Repairs
Timing your repairs strategically ensures optimal material performance and project success rates.
London’s seasonal changes influence repair timing and methods significantly. Autumn and spring typically offer ideal conditions for roof work, with moderate temperatures and variable but manageable weather. Winter moisture and ice present hazards, while summer heat can complicate adhesive curing.
Plan major repairs during dry seasons to allow proper material curing and prevent weather-related complications. Emergency repairs to storm damage or water leaks demand immediate attention regardless of season, but these situations often cost more due to urgency premiums.
Cost Factors and Budget Planning
Understanding expense variables helps you allocate resources appropriately and avoid budget surprises.
Repair expenses vary significantly based on damage extent, tile sourcing, and professional fees. Simple tile replacements cost considerably less than structural repairs or extensive flashing replacement. Location within London influences labor costs—central areas typically charge higher rates than outer boroughs.
Material selection affects pricing, with traditional clay tiles commanding premium prices versus concrete alternatives. Obtaining detailed quotes before proceeding protects your budget and prevents cost surprises. Many professionals offer payment plans for substantial projects, improving affordability for homeowners.
Frequently Asked Questions
How often should I inspect my tile roof?
Schedule formal inspections annually, ideally after winter when weather damage becomes apparent. Between inspections, perform visual checks from ground level with binoculars after severe storms. Address concerns immediately to prevent small issues from becoming major expenses.
Can I repair my tile roof in winter?
Winter presents challenges, including ice, frost, and reduced daylight hours. Material curing times extend in cold conditions, and wet surfaces create safety hazards. Emergency repairs proceed regardless, but non-urgent work typically waits for spring or autumn.
What’s the difference between tile repair and replacement?
Repairs address specific damage—cracked tiles, failed flashing, or mortar issues—while preserving existing structures. Replacement involves removing entire roof sections and installing new materials, typically chosen for aging roofs or extensive damage beyond practical repair.
How long do tile roof repairs typically last?
Quality repairs using appropriate materials often last 20-30 years. Factors affecting longevity include weather exposure, maintenance consistency, and repair complexity. Professional slate installation in London and quality materials significantly extend repair lifespan beyond DIY alternatives.
Protect Your London Home’s Roof Today
Your tile roof represents a significant investment deserving proper care and strategic attention. Armed with knowledge about inspection procedures, repair fundamentals, and maintenance requirements, you’re equipped to address issues confidently.
Whether tackling simple repairs yourself or engaging professionals for complex work, prioritizing maintenance prevents costly emergencies.
London’s variable climate demands vigilance, but systematic roof care protects your home and maintains property value long-term. Start with a thorough inspection today.