A tile roof installation is a significant investment that demands precision and expertise to ensure long-term performance. Many homeowners across London delay this critical process due to its apparent complexity.
However, understanding the fundamental steps transforms this daunting task into a manageable project. Professional tile roofers employ proven techniques combining proper underlayment, strategic batten spacing, and secure mechanical fixing.
This guide reveals the exact process experienced specialists use to deliver roofs that withstand London’s unpredictable weather for decades.
Steps for Installing a Tile Roof: Understanding the Complete Process
Installing a tile roof follows a structured methodology beginning long before the first tile touches the surface.
Step 1: Prepare the Roof Structure and Install Underlayment
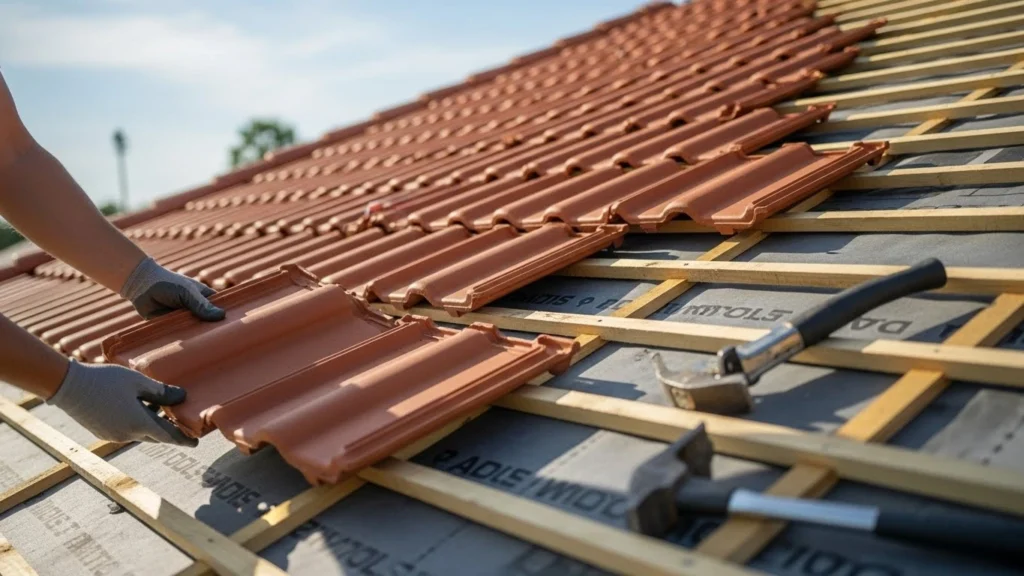
Preparation forms the foundation of successful tile roof installation. Your roof structure must be completely clear of nails, splinters, and debris that could puncture the membrane layer. Clean rafters ensure the underlayment sits flush without tears.
The underlayment creates the initial defense against moisture penetration, functioning as a secondary barrier during construction. Modern breathable membranes allow vapor to escape while stopping liquid water completely. This breathability prevents attic condensation that decays wooden structures over decades.
Start at the eaves and roll the membrane parallel to the roof slope. Use 25mm galvanized clout nails spaced approximately 50cm apart along edges. The membrane should drape slightly between rafters, creating a 10–15mm sag that channels water toward gutters.
Step 2: Calculate and Install Battens with Precise Spacing
Batten installation requires mathematical precision to ensure tiles sit properly across the entire roof. These horizontal timber strips create the framework supporting tiles, and their spacing determines whether water sheds properly. An incorrect gauge causes tiles to compress at the ridge or stretch at the eaves.
Manufacturers provide specific gauge recommendations based on tile coverage and overlap. Generally, concrete tiles demand 300–340mm center-to-center spacing, while clay tiles typically require 320–360mm. Always consult your tile manufacturer’s specifications before cutting battens.
Calculate gauge by placing two tiles on two battens, then adjusting separation until you achieve 75–100mm overlap. Measure the exact distance between batten tops—this becomes your master gauge for the entire roof installation.
Use a simple spacer cut from timber offcuts. Place it upright on each fixed batten, then nail the next batten at its top. This method ensures consistency across all courses without measuring each batten individually.
Mark chalk lines from eaves to ridge at every third tile position. Your battens must remain perfectly parallel to the eaves and ridge throughout the entire roof.
| Installation Phase | Primary Function | Critical Tolerance |
| Membrane Installation | Moisture barrier | 15mm drape between rafters |
| Batten Spacing | Tile alignment and support | Gauge accuracy within 5mm |
| Tile Positioning | Weather protection and aesthetics | 50mm eaves overhang |
| Mechanical Fixing | Wind and uplift resistance | Per manufacturer specifications |
Step 3: Secure Tiles with Proper Fixing Methods
Modern UK practice favors dry fixing, where mechanical fasteners provide superior performance compared to traditional mortar-set tiles. Building regulations require mechanical fixing for residential roofs to meet wind uplift standards.
Dry fixing utilizes specially designed nails or screws penetrating the batten a minimum of 40mm. Use galvanized or stainless steel fasteners, especially near coastal areas prone to corrosion. Fasteners must never penetrate tile glazing surfaces, which crack easily under pressure.
For concrete tiles, nail every third row starting from the bottom. In exposed locations or steep pitches, increase frequency to every row. Ensure fasteners penetrate tile pre-drilled holes completely, achieving full 40mm batten penetration.
Wet fixing involves bedding ridge and hip tiles in mortar, then applying mechanical fixings. This hybrid approach provides wind resistance while accommodating traditional tile aesthetics. Mortar joints must cure properly before the roof becomes weather-resistant.
Fastener selection matters critically. Aluminum nails corrode rapidly in UK maritime climates. Galvanized steel performs adequately inland, but stainless steel provides superior protection in coastal zones where salt spray accelerates corrosion significantly.
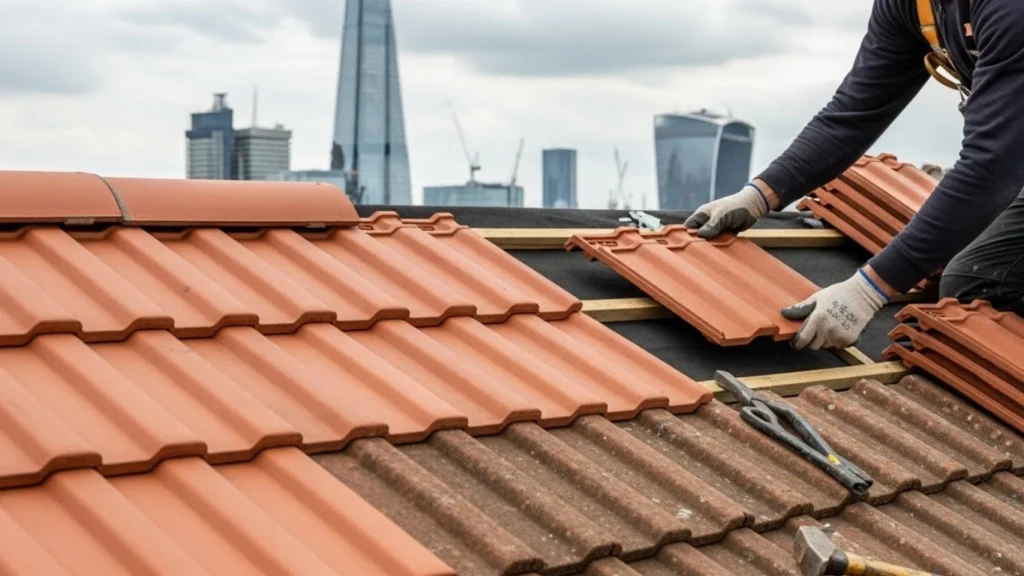
Step 4: Position Tiles with Precision Alignment
Start tiling from the bottom eaves, working upward in horizontal courses. Position the first row so tiles extend 40–50mm into gutters, approximately reaching the gutter centerline. This promotes effective water drainage without soil accumulation at gutter edges.
Use chalk lines as your guides, placing every third tile exactly on the marked line. This prevents diagonal creep that develops when relying on visual judgment alone. Ensure tiles sit properly, hooked onto battens with lugs fully engaged.
The overlap should match your calculated gauge consistently throughout all courses. At valleys and roof edges (verges), maintain 38–50mm overhang on both sides. Measure overhangs frequently to catch creep before it becomes excessive.
Step 5: Complete Penetrations and Ridge Finishing
Chimneys, roof vents, and solar mounting points require careful waterproofing to prevent leaks from developing. Around penetrations, turn underlayment up the obstruction faces, securing it temporarily until permanent flashing is installed.
Cut tiles to fit snugly around obstacles, creating interlocking patterns that shed water away from penetrations. Use tile cutters for clean cuts that prevent sharp edges.
Apply roofing sealant or flashing around all penetrations. Modern installations use integrated flashing systems designed specifically for tile roofs, ensuring compatibility through thermal cycling.
Ridge and hip tiles cap the roof’s highest points. Bed these in mortar for weather tightness, then apply mechanical fixings. Ridge tiles overlap the top course by a minimum of 75mm, creating redundant water-shedding at this critical junction. Allow mortar 48–72 hours of curing time before heavy rain exposure.
Common Installation Mistakes and Prevention
Undersized battens cannot support tile weight across 600mm joist spans. Always use 50x25mm timber minimum, verified against BS 5534:2014+A2:2018 standards. Undersized battens deflect under tile weight, creating stress points and premature failure.
Insufficient underlayment overlap allows water to seep at seams during heavy rainfall. Maintain 150mm minimum overlap vertically and 300mm at valleys without exception. This prevents water bridging that appears after heavy weather.
Poor tile alignment creates water bridges where tiles no longer shed water properly. Use laser levels or chalk lines religiously, never relying on visual judgment. Human eyes unconsciously compensate for roof contours, creating alignment errors.
Improper fastener penetration leaves tiles loose after thermal cycles. Verify every fastener achieves minimum penetration before accepting installation. When facing complex roof geometries, professional installation of tile roofs in London specialists can evaluate your specific requirements.
Post-Installation Inspection and Maintenance
Complete tile roof installation requires thorough inspection before accepting the work. Walk the roof systematically, checking every section. Verify tile alignment across all roof planes and confirm that ridge and hip tiles sit flush without gaps.
Inspect all penetration flashings for sealant integrity. Look for debris trapped under tiles indicating installation defects. Schedule follow-up inspections after the first winter season since thermal cycling causes minor settlement.
Verify that no fasteners have backed out and tiles maintain secure seating after weather exposure. Establish a maintenance schedule including semi-annual inspections, gutter cleaning, and moss removal. Understanding the reasons for regular roof inspections helps homeowners protect their investment long-term through preventative care.
✔ Check out the Seasonal Maintenance Guide
Specialized Tile Types and Installation Considerations
Concrete tiles work best in roof restoration process applications where durability matters most. These heavier tiles demand structural verification before installation proceeds to ensure rafters support concentrated loads.
Clay tiles provide superior aesthetic appeal and longevity, exceeding 100 years with proper care. Installation follows identical procedures, but clay’s lighter weight permits more flexible joist span requirements compared to concrete alternatives.
Interlocking tiles simplify installation through hook-and-lock mechanisms that reduce fastener requirements. Their profiled surfaces shed water more aggressively than flat tiles in low-pitch applications.
When replacing existing roofing, slate roof installers in London provide guidance on material transitions. London’s damp oceanic climate demands materials resisting moisture absorption and freeze-thaw cycling. Clay tiles absorb only 6% moisture compared to concrete’s 13%, making clay superior for UK conditions.
Modern breathable membranes prevent attic condensation that decays wooden roof structures. When undertaking flat roof replacement in London alongside pitched roof work, coordinate material compatibility to prevent issues at transitions.
Professional Installation vs. DIY
Tile roof installation demands experience in recognizing subtle defects and corrections. Working at height introduces serious safety risks, with falls representing roofing’s primary injury cause. Professional installers utilize proper fall protection systems to prevent accidents.
Manufacturer warranties typically require professional installation, protecting your investment long-term. DIY work voids most guarantees, leaving you financially exposed to future problems.
Complex roof geometries, unusual tiles, or integration with existing structures justify professional assessment. Maintaining lead roofing and other specialty materials demands contractor expertise unavailable to homeowners tackling DIY projects.
For comprehensive support, consult professional roofing solutions in London to evaluate your specific requirements. UK tile roof installations must comply with BS 5534:2014+A2:2018, the Code of Practice for slating and tiling pitched roofs. Building Regulations Part Q mandates structural calculations for loads exceeding the rafters’ design capacity.
Frequently Asked Questions
Q: What is the minimum roof pitch for tile installation?
A: Most manufacturers specify 30 degrees as the minimum pitch for clay and concrete tiles. Lower pitches require increased headlap and additional underlayment protection. Specific pitch requirements vary by tile profile and manufacturer specifications.
Q: How long does a tile roof installation typically take?
A: Professional crews complete average residential roofs of around 80 square meters in 5–8 days. Steep pitches, numerous penetrations, and hip and valley intersections extend timelines. Weather delays frequently impact schedules during UK installations.
Q: Can I install new tiles over existing tiles without stripping?
A: Generally, no. Old underlayment may hide structural damage or rot, requiring assessment before installation. Proper installation requires stripping to rafters, assessing structural integrity, and installing new membranes. This prevents future failures and protects warranty coverage.
Q: What is the cost difference between clay and concrete tiles?
A: Concrete tiles cost approximately 20% less initially. However, clay tiles last significantly longer, exceeding 100 years versus 30–50 years for concrete. Long-term ownership costs remain comparable when calculating full lifecycle expenses.
Q: Do tile roofs require special guttering or downpipes?
A: No, but deeper gutters around 150mm accommodate tile roof runoff better than shallow guttering. Ensure gutters are clean easily, as debris accumulation causes water backup and potential leaks developing beneath tiles over time.
Your Tile Roof Investment Deserves Excellence
Mastering tile or slate roof installation transforms your London home’s durability and aesthetic appeal. The five fundamental steps combine proper underlayment, precise batten spacing, and secure mechanical fixing into comprehensive protection.
Whether tackling this yourself or hiring professional roofing solutions in London, prioritize precision over speed. Quality installations protect manufacturer warranties while ensuring decades of weather resistance.
Your roof investment deserves expert execution that withstands London’s demanding climate conditions year after year.